

Description
The Daniel Defense AR-15 Iron Sight Set is built from the highest quality aircraft grade aluminum and will never let you down. Unlike our belief in the fact “all men are created equal,” AR-15 sights are not. Accuracy and usability depend on quality sights. Consisting of the A1.5 Fixed Rear Sight and Rail-Mounted Fixed Front Sight, this iron sight set will provide a lifetime of service. The A1.5 Fixed Rear Site makes the optimum back-up sight for shooters using today’s most popular reflex optics. The Rail Mounted Fixed Front Sight makes it unobtrusive and snag-free, and allows the operator to facilitate the use of compact weapon-lights forward of the sight, such as the X300, TLR-1, etc.
MATERIALS & CONSTRUCTION
- Aircraft Grade 6061-T6 Aircraft Grade Aluminum
- Military Specification Type III Hard Coat Anodized
- Patented Rock & Lock Attachment Technology
- Made in the USA!
When it comes to weapons optics, specifically on the AR-15/M4, iron sights should be the first option considered. As we all know, there’s tons of options for optics including: red dots, magnified scopes, magnifiers, holographic, and even tritium powered scopes. The marketing and money spent on advertising these types of optics has exploded in the last 20-30 years. Even more so in the last decade. We’ve been conditioned over the years to believe that spending money on what experienced combat shooters consider “fluff toys”, is somehow going to improve our marksmanship and make us more proficient shooters. However, the exact opposite is what’s happening. Since the mass introduction of these optic options in the last couple decades, professional instructors and shooters like Paul Howe of Combat Shooting and Tactics have repeatedly reported and seen first hand that the use of “other-than-ironsights” has dramatically decreased the efficiency of our most popular weapon systems such as the AR-15/M4. Both military and civilian shooters are experiencing the same negative trend. The fundamentals are being abandoned for fluff, marketing promotions, and just plain laziness.
Lets go ahead and state the obvious message of this blog post: IRONS ARE MORE ACCURATE, MORE DEPENDABLE, AND DEVELOP MARKSMANSHIP SKILLS THAT WILL TRANSFER OVER TO THE FLUFF TOYS, IF YOU DECIDE TO USE THEM.
The most important aspect of utilizing iron sights, is the reliability. Most of us today that buy and build AR’s, are doing so for the proverbial Shit Hit The Fan (SHTF) scenario. If and when this event happens, batteries are going to be in very short supply. Even if you stockpile batteries, they tend to lose their charge and or go bad by some other means. No battery will stay good and charged forever, and most will only last a few years before they are rendered unusable. Although nothing is full proof against the rigors of combat, irons are the most durable, by a long shot. I’ve yet to see in 17 years of shooting, a set of irons give up or end up unserviceable.
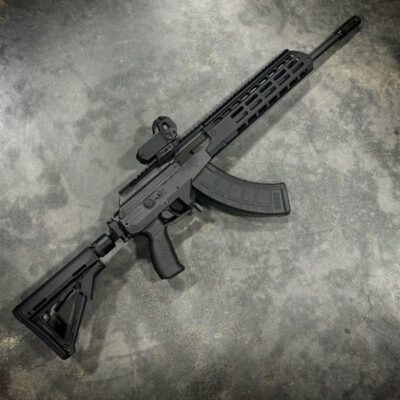
I know this will ruffle some feathers, but iron sights are faster at getting a shot off and deliver more surgical accuracy in combat style shooting. I understand how this statement sounds ludicrous. However I spent just one day on the range testing this. What I found surprised me a lot. I was shooting the American Resistance 16″ 556 rifle with 62gr M855 ball ammo (green tip) at 200 yards in the prone position without a bipod or bag. Just standard prone (no fluffy accessories). First I used a Burris 1-4x scope, shooting a human sized, torso steel plate. I set the magnification to 4x and tried to fire 10 rounds as fast as I could effectively shoot. With the Burris scope, I shot my final round at 21.06 seconds on the shot timer. I had 4 impacts on steel in this rapid fire drill. The next drill I ran was using Daniel Defense AR-15 Iron Sights Rock & Lock using the same weapon, same ammo, and same shooting position.. These are a very basic set of fixed iron sights that I’ve added the XS System’s CSAT Rear Aperture to (Covered more in depth under “Red Dot Optics”). Again, the drill was shot from 200 yards. The first noticeable difference was how much faster I was able to get the weapon back on target for follow up shots. The next thing I noticed was how often the steel plate was ringing and singing to me. 9 out of 10 rounds has impacted the steel and my time from start to finish was 12.30 seconds! Almost half the time, with more than double the hits! I did not expect this to be the case at all. After leaving the Marine Corps in 2012, I also left my iron sights. I immediately started buying and using red dots and scopes. They were so much cooler looking, and everyone in the civilian shooting world was ranting and raving about how awesome their weapons were with these high-tech, high dollar optics. I followed suit unfortunately. Well here we are today, and I’m having to swallow my pride. I’m taking a step back, and ditching the new tech for the old school. With all that being said, I still use, sell, and promote red dots, scopes, ect in a limited capacity. Except now I promote them with a more educated explanation.
- LOW POWER MAGNIFIED SCOPES:
Lets start with the 1-4x, 1-6x, and 1-8x scopes. Prices on these are on the cheap end, $200, and go all the way up to $2,000. Although they do have their place on weapons for some shooters, these are my least preferred. Iron sights do have a couple major downsides: longer range visibility and low visibility/night shooting. First lets cover being able to articulate at 200+ yards (daytime) who someone is, what’s in their hands, and if they’re a worthy target. Unfortunately iron sights just don’t have these abilities. You don’t have to use a powered scope to overcome these obstacles. You can carry a magnified monocular, that you keep either in your pocket/bag, or on a lanyard around your neck. According to many police officers and combat action military veterans, most firefights happen inside of 100 yards, and even more inside of 25 yards, and more than likely it’ll be around 7-10 yards. This brings up a great point for irons. For most gun fights, it seems that magnified optics are really useless. Irons will give you everything you need plus they won’t add the extra weight to the weapon, and you won’t have to spend a fortune on useless fluff. The average magnified scope and mount set weighs about 1.5 pounds! Ounces equal pounds, pounds equal fatigue, and fatigue equals poor shooting technique. The DD irons I use are 3.4 ounces. As mentioned above, I use the XS Sight’s CSAT Rear Aperture. This is the most practical, simplistic, and ingenious aftermarket product that the AR-15 has seen in the last 20 years, and only cost around $40. What is it? The CSAT aperture accounts for the 2.5″ offset that the 556/223 delivers when zeroed at 100 yards. Explanation: When you zero your AR-15 at 100 yards, then you move up to 7 yards, which as stated by numerous combat shooters and police officers, is where the majority of firefights happen, you’re going to notice that your zero isn’t hitting center mass anymore. At 7yds, your point of aim (POA) remains the same, but your point of impact (POI) has changed. This is due to the line of sight, line of bore issue. The CSAT aperture has a small cut above the small peep hole that the shooter will line up with the front sight post (just like a set of pistol sights are used), that perfectly corrects the 2.5″ offset. This also gives the shooter a much faster and efficient shot time. Usually around .6 of a second to get a round fired and surgically placed.
- RED DOT OPTICS:
As for red dot optics, these are probably the most widely used in the civilian and law enforcement communities. Prices on these range from $75, all the way to $1500, depending on brand, features and/or battery life. Don’t get me wrong, these are very useful additions to your weapons platform. When used incorrectly though, they can really cause some marksmanship issues. Most red dots do not have a way to account for the offset at close distance. If you watch enough body cam footage from police officers, you’ll begin to notice that that when the shot is presented, it’s rarely in a flat range, paper target style shot. The officer doesn’t have a clean and clear shot of only the suspect The officers a lot of the time, have only a portion of the suspect to aim in on. Either they have a hostage in from of them, with only a small portion of their head visible with the hostage being held in front of them, or the suspect is concealed behind something. This particular scenario is probably the most common from what I’ve watched. This is very important to note because if you don’t account for the 2.5″ offset, it’s really easy to shoot the hostage by mistake due to stress and situation overload on the weapon operator. For me personally and what I recommend to my students and customers is red dot optics should be used in conjunction with iron sights. Due to iron sights being pretty much useless in low light and/or night time shooting, the red dot optic definitely has its place. When it’s dark/low light is when the red dot shines, pun intended. However, there is a lot of misinformation on how these are to be used. They should be zeroed at 100 yards just like any optic should on the 556/223 AR-15/M4. As for the POI when using red dots, be sure to use the dot correctly: We’re going to use the 7 yard line for this example, for ease of understanding in text and not on the physical range to show you. At 7 yards, you’ll want to aim in a small pasty style target (we use the CSAT target, and aim in on the black 1″ square pasty. The red dot should be sitting at the extreme bottom of the 1″ square, with the top of the red dot, sitting on the bottom of the pasty. (NOT SITTING ON TOP AND COVERING THE 1″ PASTY). Your impacts will then be 2.5″-3″ low of the 1″ pasty. This is due to your 100yd zero and the line of sight/line of bore offset. NOTE: You can use an unfired 223/556 to measure if you don’t have a tape measure on the range (unfired 223/556 round is 2.25″ and you’ll estimate a .5″ extra). If you don’t get these results at 7yds, that means your 100yd zero isn’t as perfect as you thought. Go back to 100yd and re-check zero. Also note that this technique should be used on Trijicon ACOG’s as I feel they fall under the red dot optic category. To further test the iron sights against new tech, I moved to the 7 yard line for close quarter, speed drills, in the standing position from the low ready. In this test I ran the Trijicon MRO red dot optic first. For the target, I utilized the “HEAD SHOT” target designed by Paul Howe at CSAT. The reason for this choice of target is it takes away the “flat range” full paper target image and gives the shooter a much smaller target to shoot at with a hostage in front of the suspect, leaving only a small portion of the suspects head to shoot at. This is important in this drill because we should have a 100 yard zero, and at 7 yards, we should have a 2.5″ low POA/POI offset. This was a real eye opening test. One round was fired, with a total of 5 shots, for each timed test. When using the Trijicon MRO red dot, it seemed like it was going to be a no brainer that it was faster as I felt I could see and access the target faster. And this was partly true initially. However my accuracy and shot placement was a bit off and caused me to hit the hostage or get really close many times. This is due to having to “hold” for the offset while shooting a speed drill. My average time from the low ready to a shot on target was .95 second. Next up, I shot this same drill using the DD iron sights with the CSAT aperture. Average shot time was .71 second! The most noticeable improvement was how accurate these rounds were impacting the target. Not one round hit the hostage, nor did they get anywhere close. Looking at the impacts on paper, you would have assumed I was doing a non-speed drill and taking my time to place each shot. Not the case at all. I was .24 second faster and much more precise.
- HIGH POWER MAGNIFIED SCOPES:
Magnified scopes (2x-20x) are the final option, and in my opinion the least desirable personally. They do have applications where they can be used effectively and practically. Most of time where these are practical, is on an AR platform weapon that’s chambered in a caliber other than 223/556 such as 6.5grendel, 224 Valkrie, or AR10 long range platforms. The only real exception to this general rule in 556/223 are AR-15’s set up with 18″ and longer barrels. If you’re building a long range sniper rifle or bench gun, then yes, a high powered magnified scope would be suitable. For this blog post, I’m more focused on battle/duty rifles that are used in a more short range (7-300 yards) and utilizing 16″ or shorter barrels. If you’re shooting beyond 300 yards, then yes, scopes might be applicable to your set up due to needing to see what the naked eye physically can’t. If your weapon is a 16″ or shorter barrel, iron sights will suit you perfect out to 300 yards, for daytime shooting. Using your 100 yard zero with the CSAT aperture, you can effectively shoot targets from 7-300 yards without adjusting sights, clicking turrets, or ranging. For the 7-11 yards shots you can use the CSAT aperture. For 12-200 yards you’ll use the small peep on the rear sight, aiming center mass on your intended target. For the 201-300 yard shots, you can simply use the small peep, but hold the front sight post at the center of the head. The difference of impact from 100-200 yards is too marginal to account for in combat style shooting (2-3″). The drop from 100 to 300 is a little over 12″. So you can put a round in the belly by holding high on the target. Effectively you have one zero, to account for shots from 7-300 yards! This is why the iron sights fitted battle rifle is so much faster and efficient. No fluff, less weight, less fatigue, no clicking, no ranging, and much cheaper on the wallet.
USING IRON SIGHTS, RED DOT, AND A SUPPRESSOR
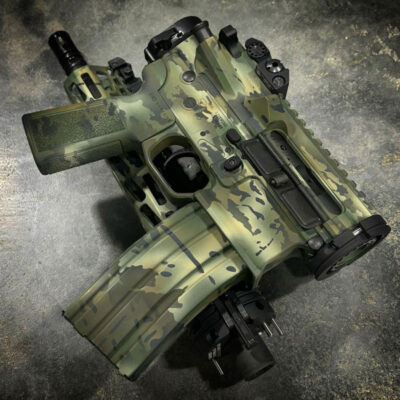
Another great benefit of iron sights, is the ability to have two independent zeroes on your weapon. The reason for this is you may want to run your weapon both suppressed and un-suppressed. The problem with this if you zero your weapon without a suppressor, then put a suppressor on it, you’ll notice your zero or POI has changed. This can be remedied by utilizing a red dot with your iron sights. What you’ll do is zero your iron sights for daytime shooting without a suppressor. Then you’ll zero your weapon’s red dot with the suppressor installed. What this does for you, is gives you the option to use your irons for day shooting without the suppressor. You’ll also have the red dot zeroed with the suppressor which if the suppressor is needed for both day and/or night, you can simply switch to using the red dot. Using a suppressor at night gives a couple of really good night shooting advantages: low muzzle flash report and low vis/low key night operations due to quieter weapon noise.
Here’s some of the best iron sights I’ve personally used, trust, and recommend to you:
- Samson Manufacturing Front Sight
- Samson Manufacturing Rear Sight This Samson Rear sight is compatible with the XS Sights CSAT Rear Aperture
- Daniel Defense AR-15 Iron Sights Rock & Lock Fixed (front and rear). The DD rear sight is compatible with the XS Sights CSAT Aperture
- Troy BattleSight, Folding Rear Black.This Troy rear sight is compatible with this XS Sights CSAT Aperture
- Troy BattleSight, Folding Front Black.


Reviews
There are no reviews yet.